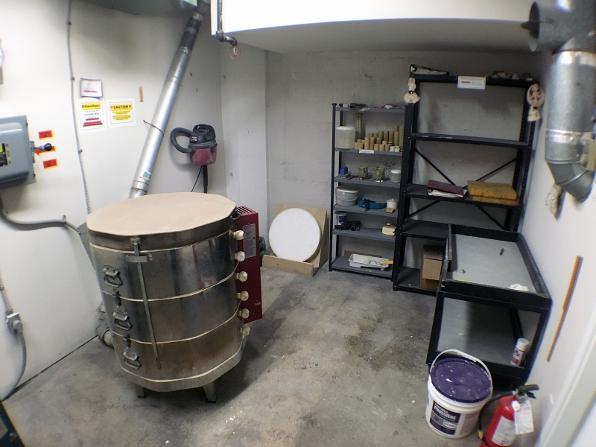
PLEASE NOTE:
THE KILN ROOM IS PRESENTLY UNDER SOME RENOVATION
THUS THIS IS AN OLDER SHOT WILL UPDATE WHEN RENO IS COMPLETED
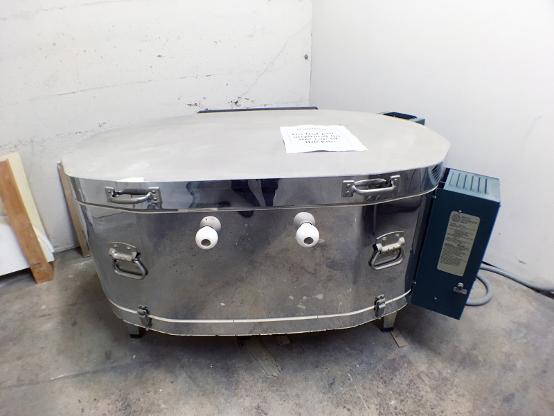
Reliance recently bought us a new kiln which has been ordered and could be here any day!!! (depending on the supply chain). It is somewhat larger. We also have the glass slumping kiln. This old kiln and the new kiln will both be set up to run along with the glass kiln though not likely at the same time.
RULES
Just like all the other rooms at the ARC we have certain rules you have to follow to use this room. These rules are set up to make sure no one person hogs or takes advantage of this room and respects the other users. Those that do are not beating "Reliance" or "The Man" but instead are beating out their fellow users. Thus anyone not following them will lose their kiln room access.
THE KILN ROOM BOSS:
Danielle from 304
604 - 345 - 0307
Every kiln room user will first have to get an orientation by Danielle before using any part of this room. What Danielle says regarding this room goes! Anyone not listening to her will be violating their lease and will also be given a massage with the reminder bat as seen elsewhere on this site!!!
FEEL FREE TO TEXT HER AT ANY TIME TO BOOK IN AN ORIENTATION
THE RULES LIST
1. You must be approved to use the kiln and any of the supplies in this room.
2. You must pre-book your firing on the chalkboard on the door. Include your Name,
Cone #, and load/unload dates.
3. You are only allowed to book ONE firing date at a time. This ensures fairness to all kiln users. Each firing takes 24 hours, so include the date you load the kiln, plus the day after.
Example:
“A” user - load Feb 21 / unload Feb 22
“B” user - load Feb 23 / unload Feb 24 and so on.
4. If you miss your pre-booked firing date, or a firing does not go as planned and someone has booked the day after you, DO NOT ASSUME it is okay to take their firing and push their dates forward. Some of us work other jobs and base our firings around our availability. You can re-book after them, or contact them to ask permission to take their firing dates.
5. You MUST fill the entire kiln to capacity. That means every single shelf is filled as full as it can be, to the top of the kiln. No firing one shelf of work at a time, unless your pieces are large enough to take up the height of the entire kiln.
• Firing an unfilled kiln degrades the thermocouple and elements extremely fast. These
parts are expensive ($40 per thermocouple & $100 per element - this kiln uses 8)
Just because it is new does not mean it won’t develop issues from over-use. Let’s make it
last!
If this rule is not followed, and the kiln room leader finds the kiln is consistently
developing issues or needs repairs, they will start charging everyone a reasonable monthly fee to add to a fund to pay for any repairs, including new thermocouples, elements or other parts. Reliance will not cover these costs.
6. If you do not have enough work to fill the entire kiln, build up a large collection of work in your studio, or on one of the metal shelves in this room labelled with your name. Wait until you can successfully fill the kiln to fire. Otherwise:
• Leave a note on the chalk board or text everyone on the user list and ask to be included
in one of their firings. Most fire at Cone 05/06 Bisque & 5/6 Glaze.
• There is a Ceramics Group chat on Instagram you can be added to.
Add @daniellecmerchant with your username and she will add you to the group.
7. Clean up after yourself! If you use the kiln room or the group ceramic room (building,
sanding, glazing or airbrushing) clean up everything so others can use the space after you.
• Keep all work surfaces clear of clay and tools when not in use.
• Store your supplies in your studio, or on one of the metal shelves with your name on it
so people know it is not for group use.
• Mop the floors and wipe down any surfaces you have used with a damp cloth.
Ceramic dust causes serious respiratory problems long term.
• Put kiln bricks back on shelf in an organized manner.
• Put kiln shelves back on platform.
8. Black Transport Cart - Return to kiln room after you have moved your work. It is the
easiest form of transportation for ceramics in this building, do not leave it in your studio
for personal use.
9. Please take turns putting new kiln wash on the shelves if you see it is chipping, or
covered with spots of glaze. This ensures everyones piece will sit flat and fire without
becoming stuck to the shelf, or have the bottoms become covered in small white flakes.
Instructions:
1. Grind off all old layers of kiln wash, including chipped wash & glaze drops. Use the
sanding brick on the shelf (slow method), or a rough grit power sander (fast method).
Do not apply new layers of kiln wash over old layers, it will cause cracking and flaking.
2. Wipe with a damp cloth after sanding to remove any dust that has collected on the shelf.
3. Mix a batch of kiln wash from the large plastic bag on shelf. The mixture should be
around 50% water 50% kiln wash. It should have the consistency of milk once mixed.
4. Using a large brush, spread 3 even layers of kiln wash over shelf, not too thick, not too
thin. Let each layer dry about 60 minutes before applying the next.
5. Bisque fire (06) the shelves before next use to ensure proper adhesion.